GitLab Dedicated
DETAILS: Tier: Ultimate Offering: GitLab Dedicated
GitLab Dedicated is a single-tenant SaaS solution, fully managed and hosted by GitLab. GitLab Dedicated operators and tenant administrators use the Switchboard UI to configure and maintain their tenant environments.
For more information about this offering, see the subscription page.
Architecture
This diagram shows a high-level overview of the architecture for GitLab Dedicated.
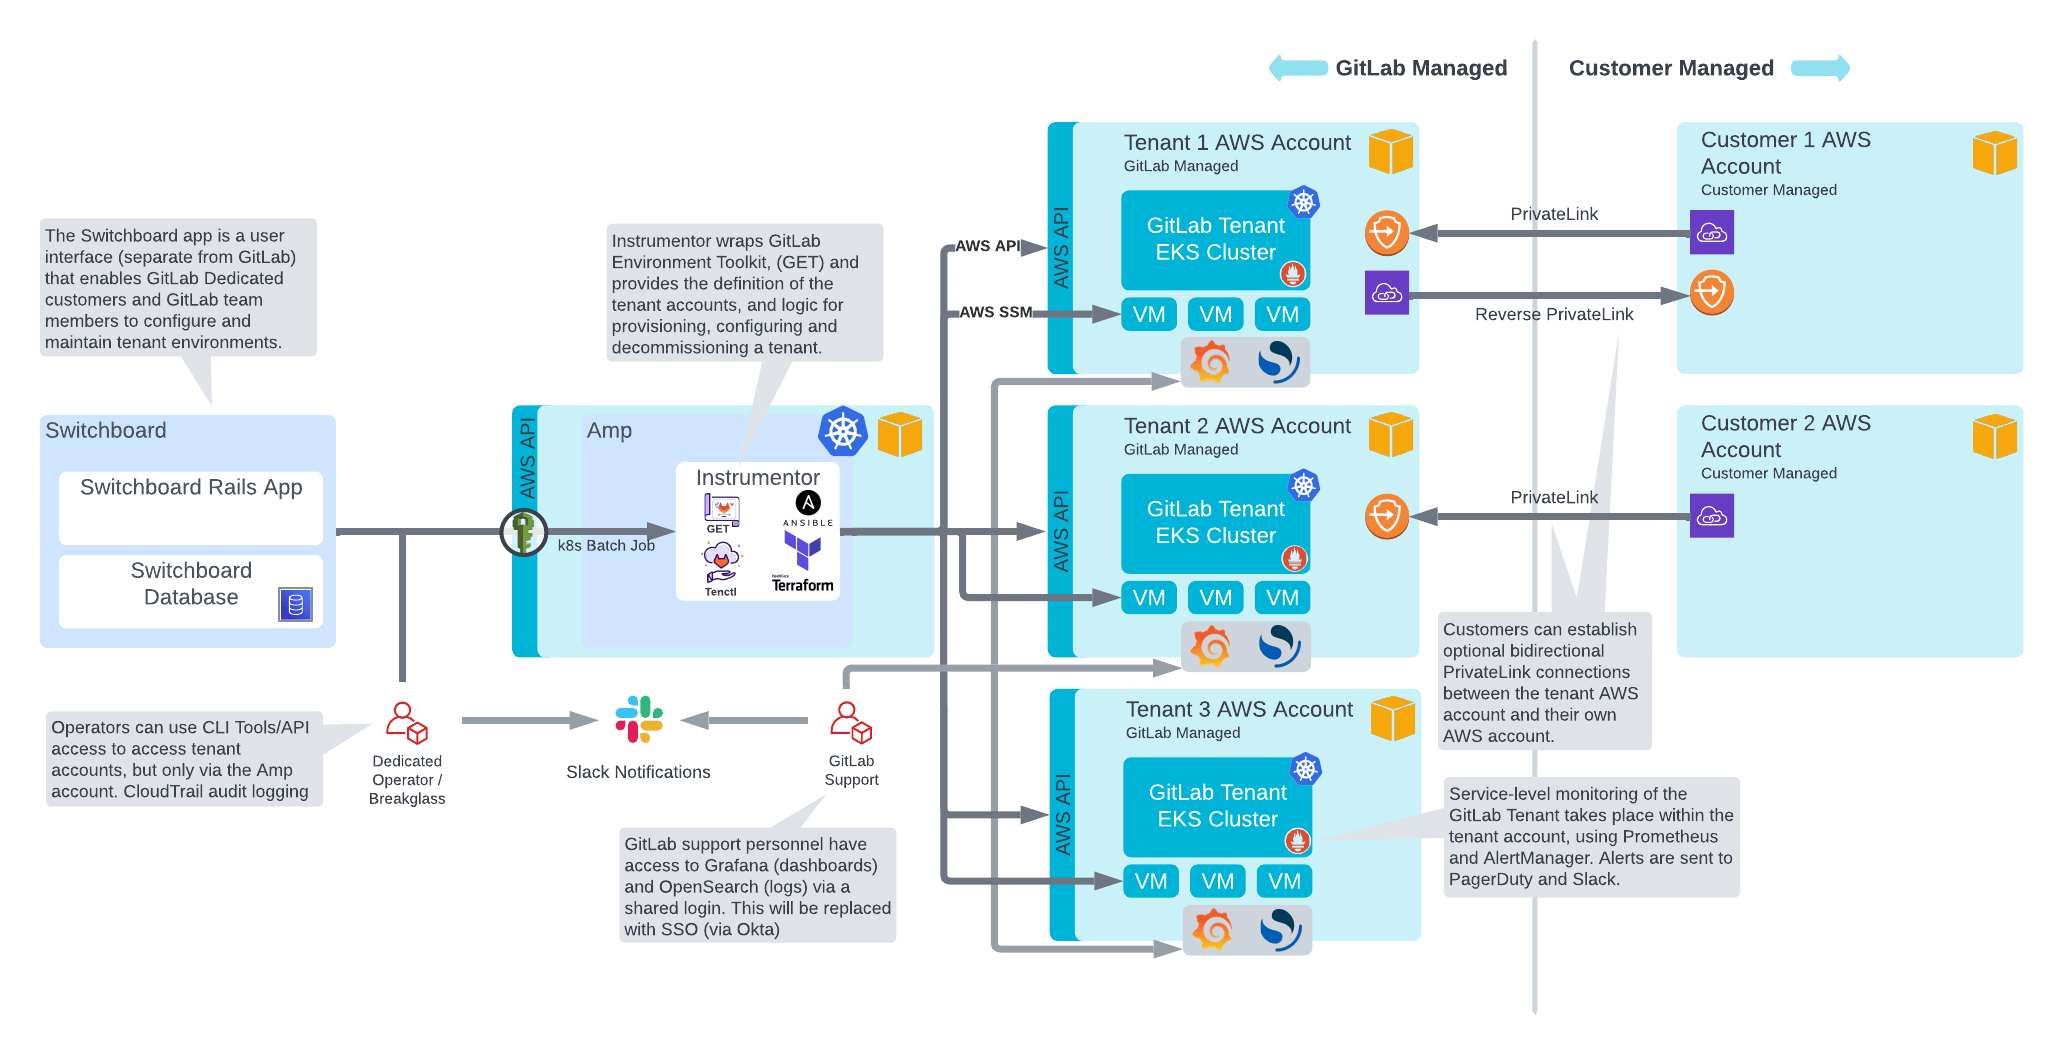
When managing GitLab Dedicated tenant instances:
- Switchboard is responsible for managing global configuration shared between the AWS cloud providers, accessible by tenants.
- Amp is responsible for the interaction with the customer tenant accounts, such as configuring expected roles and policies, enabling the required services, and provisioning environments.
GitLab team members with edit access can update the source files for the diagram in Lucidchart.
Tenant network
The customer tenant account is a single AWS cloud provider account. The single account provides full tenancy isolation, in its own VPC, and with its own resource quotas.
The cloud provider account is where a highly resilient GitLab installation resides, in its own isolated VPC. On provisioning, the customer tenant gets access to a High Availability (HA) GitLab primary site and a GitLab Geo secondary site.
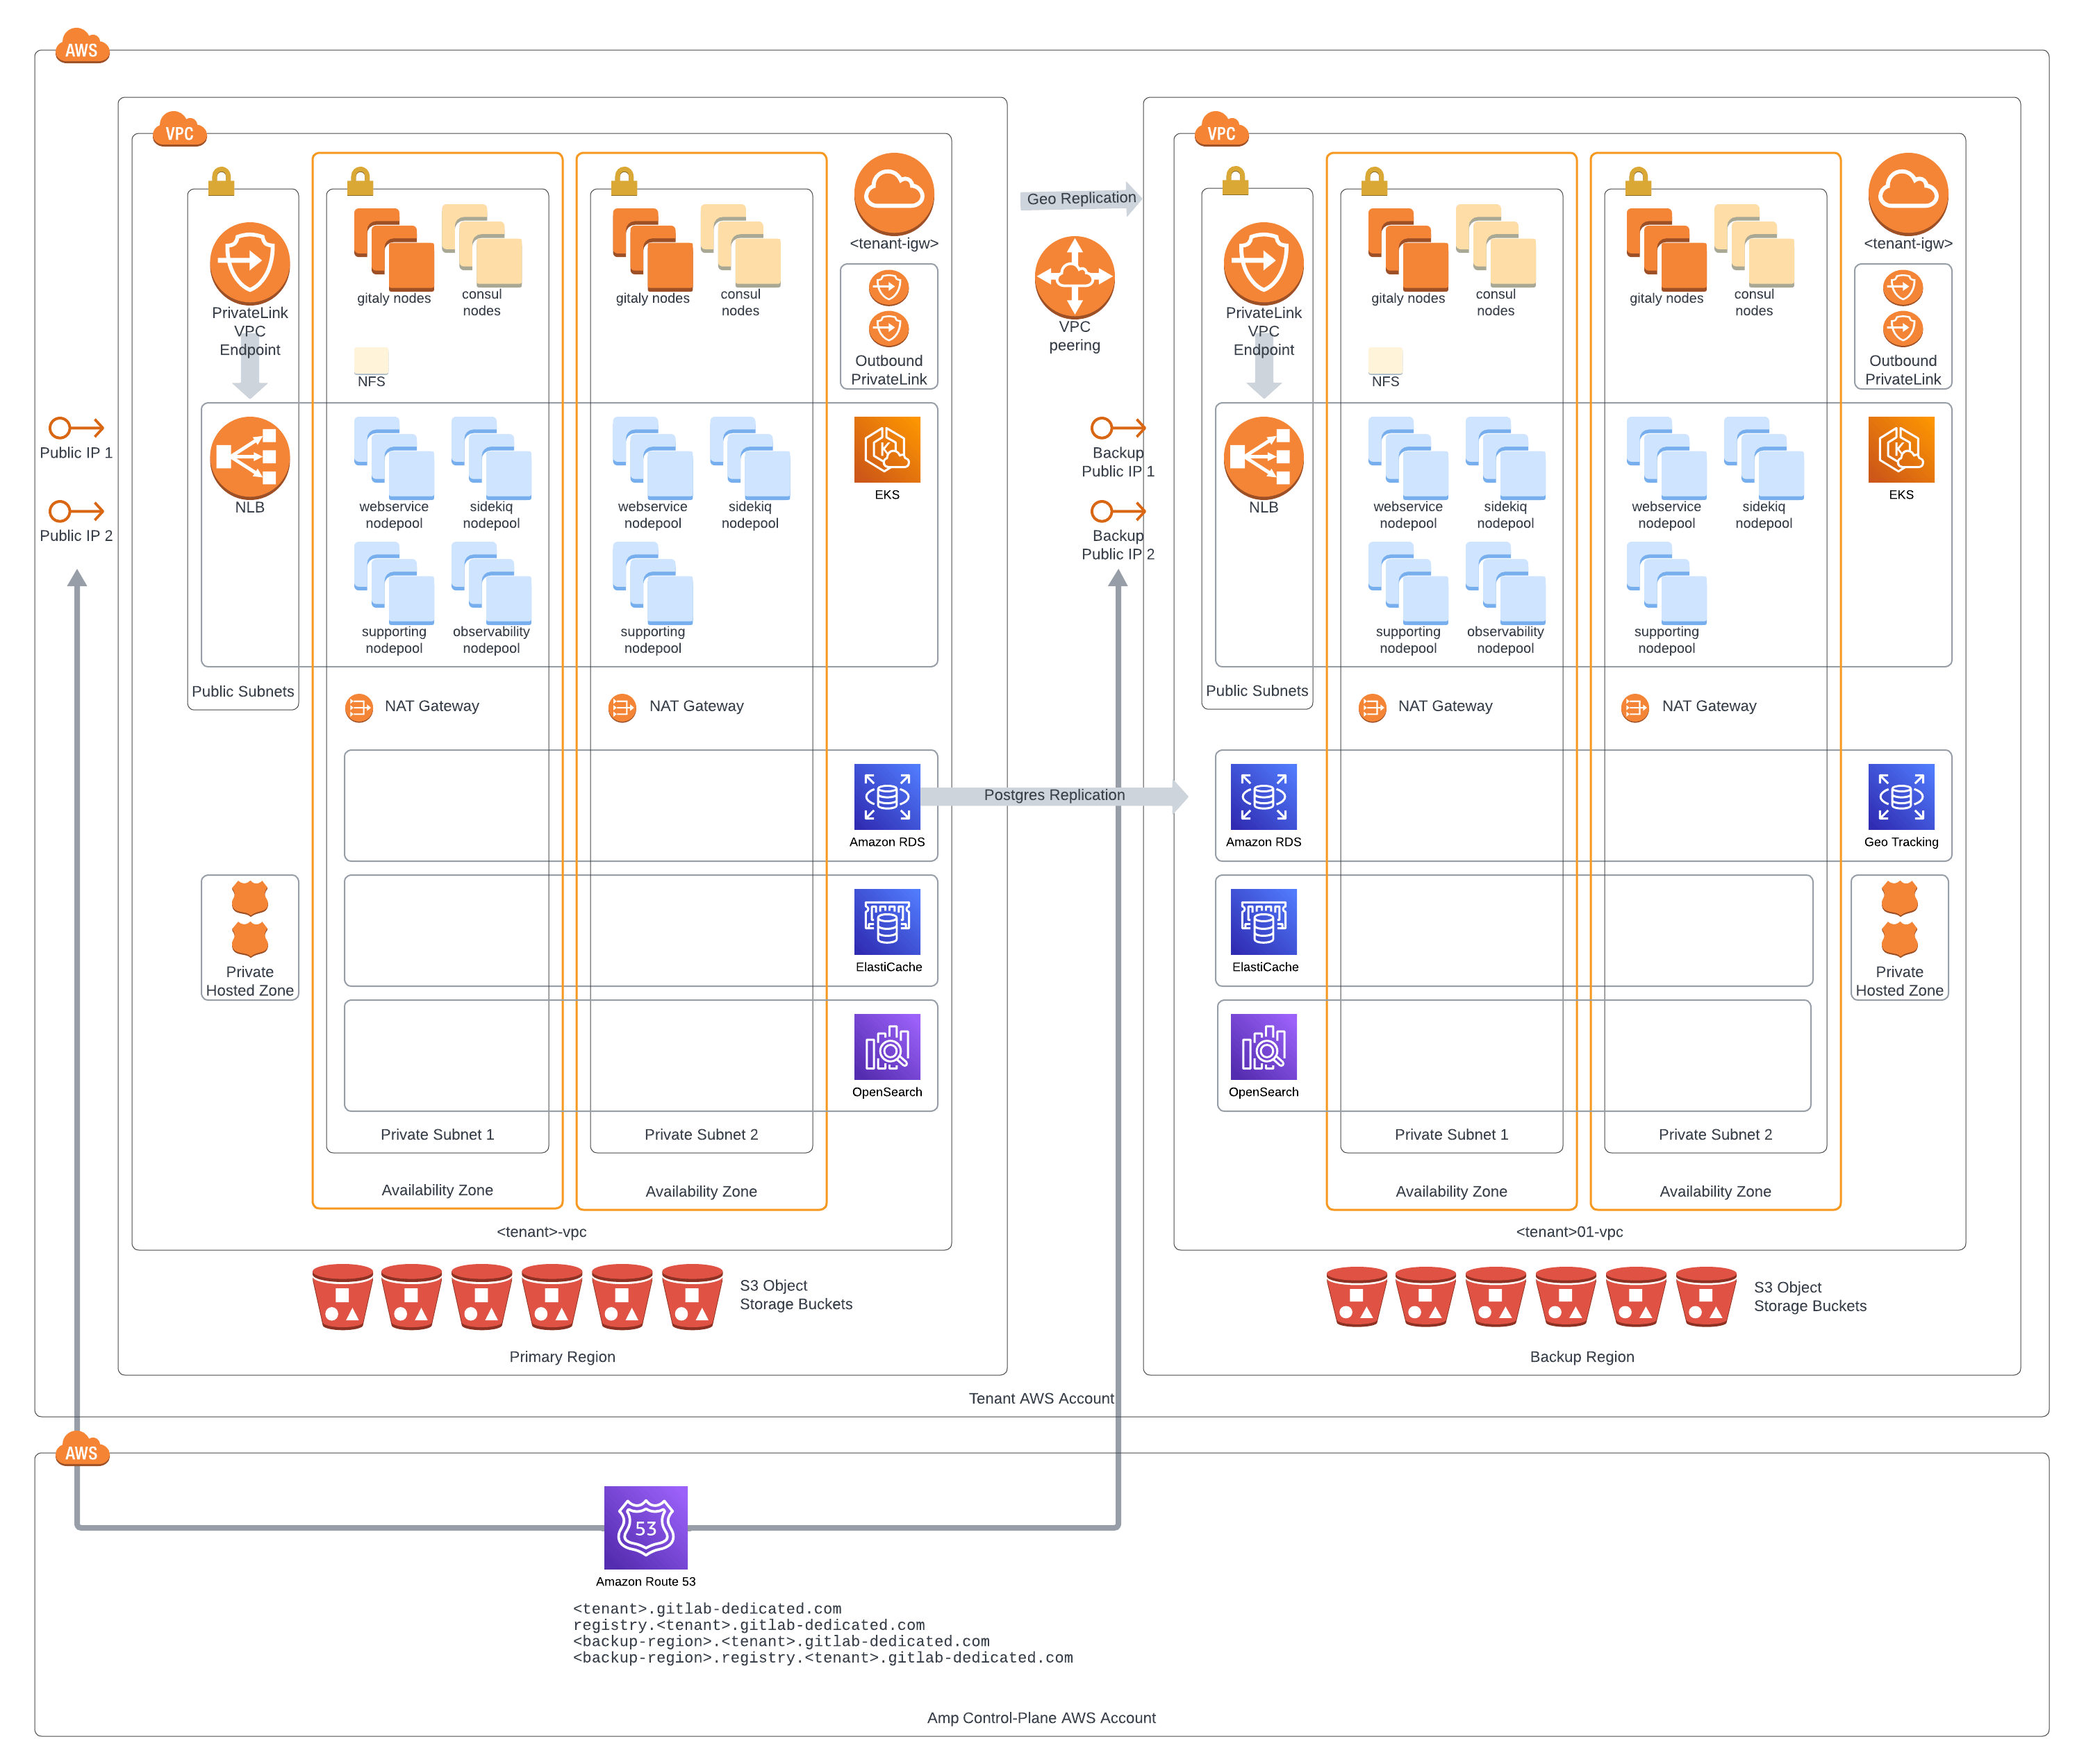
GitLab team members with edit access can update the source files for the diagram in Lucidchart.
Gitaly setup
GitLab Dedicated deploys Gitaly in a sharded setup, not a Gitaly Cluster. In this setup:
- Customer repositories are spread across multiple virtual machines.
- GitLab manages storage weights on behalf of the customer.
Geo setup
GitLab Dedicated leverages GitLab Geo for disaster recovery.
Geo does not use an active-active failover configuration. For more information, see Geo.
AWS PrivateLink connection (optional)
Optionally, private connectivity is available for your GitLab Dedicated instance, using AWS PrivateLink as a connection gateway.
Both inbound and outbound private links are supported.
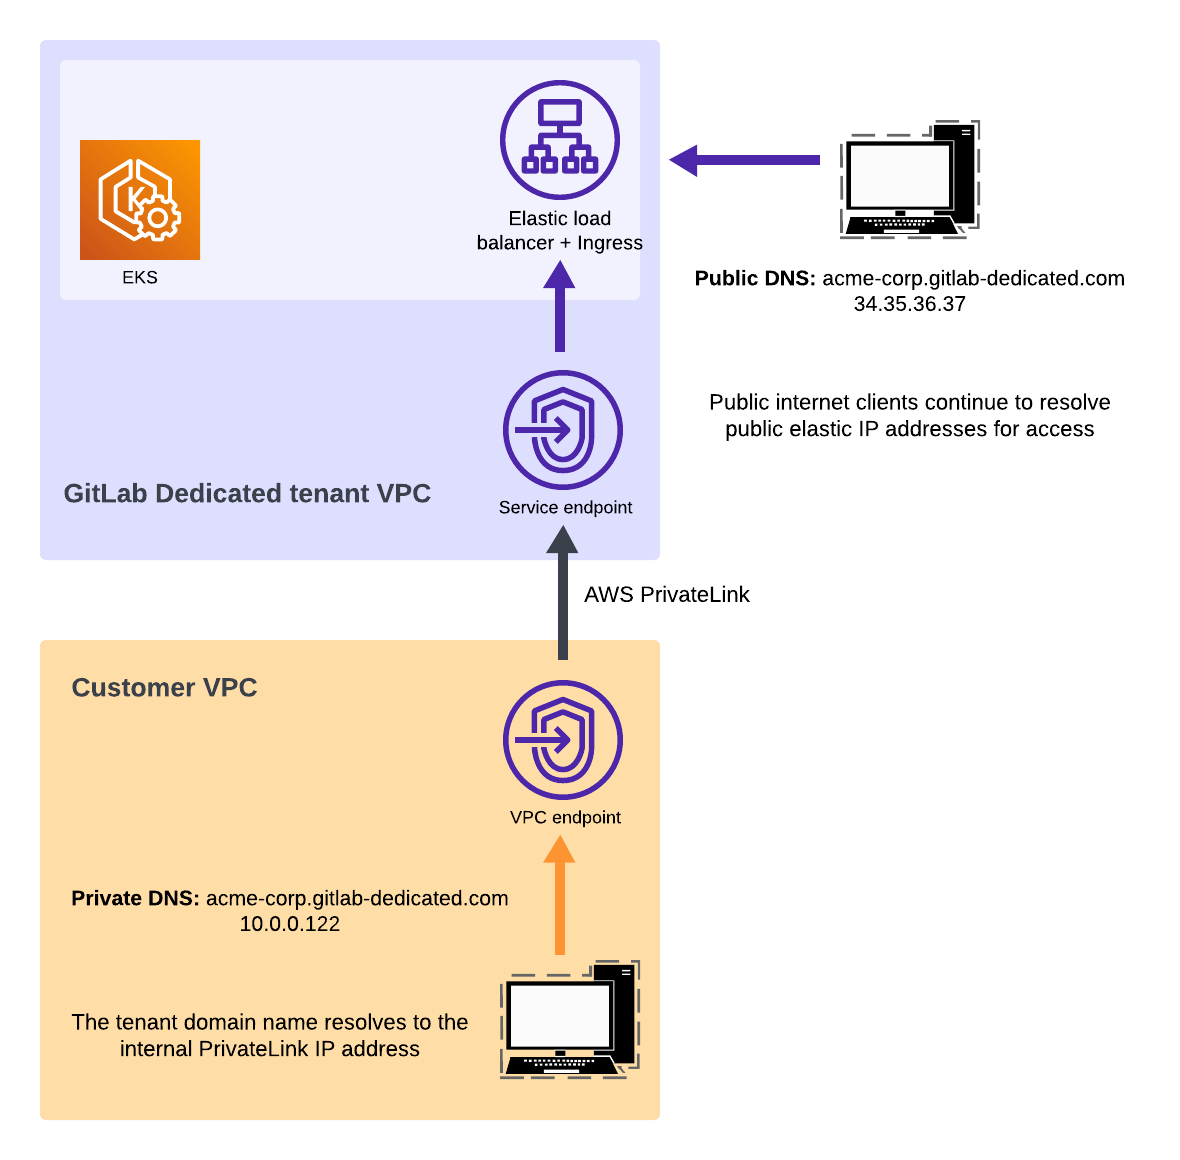
GitLab team members with edit access can update the source files for the diagram in Lucidchart.
Get started
To get started with GitLab Dedicated, use Switchboard to: